Pages

Showing posts with label #bobsredmillflour. Show all posts

November 9, 2017

Bacon Cheddar Chowder & Butternut Browned Butter Biscuits

Ever since Nichole announced November's Improv Cooking Challenge pairing was to be WINTER SQUASH & BACON I'd been collecting butternut bacon soup ideas... All through our "fall weather" of 100+° I thought it sounded like an Autumn-appropriate comfort meal. But the idea didn't jive with all the fellas. (I probably coulda snuck it on the table & they'd politely eat it.)
My next plan was to make rolls (they'll eat almost anything with yeast dough wrapped around it) but I remembered I wanted to make a chowder to show off my Portuguese tureen that I never get to use because I'm lazy we not fancy and usually serve soup out of the slow-cooker or from the pot on the stove.

But... because the hubster ended his work day an hour and a half across town, & the middle fella had a drum lesson after classes, we ended up dishing our soup out of the crocker & snatching the biscuits off the hot baking sheet. {{heavy sigh}}
I love that my slow-cooker made the chowder while I was fussing about with other concerns of the day. And while I'd planned on creating a biscuit with almond flour, I decided to just adapt Bob's recipe on the bag of his Red Mill® Gluten Free 1-to-1 Baking Flour. Best decision, ever!
I roasted the butternut halves with a bit of bacon drippings brushed over the cut surfaces... Oh, my!
So, here you go:
BROWNED BUTTER BUTTERNUT BISCUITS
 ½ c. butter
 2½ c. Bob’s Red Mill® Gluten Free 1-to-1 Baking Flour
1 T. grass-fed gelatin
½ t. sea salt
2½ t. baking powder
½ t. baking soda
1 c. diced roasted butternut
2 eggs
¾ c. buttermilk
Brown the butter over medium heat until it smells like caramel without the sweet. 
Chill to firm.In a large bowl whisk the dry ingredients.Add chilled browned butter (cut into small pieces) and use pastry blender to disperse.
Carefully stir in squash.
Mix eggs and buttermilk. Pour over biscuit mix and gently stir to make dough.Roll to 1” thickness between plastic wrap. Cut with 3” circle cutter and place on parchment.
Brush tops of biscuits with a bit of buttermilk.
Bake in pre-heated 450° oven for 18 minutes, or until tops are golden brown.
Allow to cool on baking sheet for 10 minutes before eating. (If you can wait that long!)

And now for the chowder:
Bacon Chowder

1 lb. bacon
1 small onion
3 ribs celery
3 carrots
6 garlic cloves
1 large head cauliflower
1 quart chicken broth
3 bay leaves
1 t. dried thyme
fresh-ground pepper to taste
2 c. milk
2 T. tapioca starch
2 c. water
1 lb. shredded cheddar cheese


Sauté bacon over medium heat until crisp. Set aside and remove all but a tablespoon of the drippings.
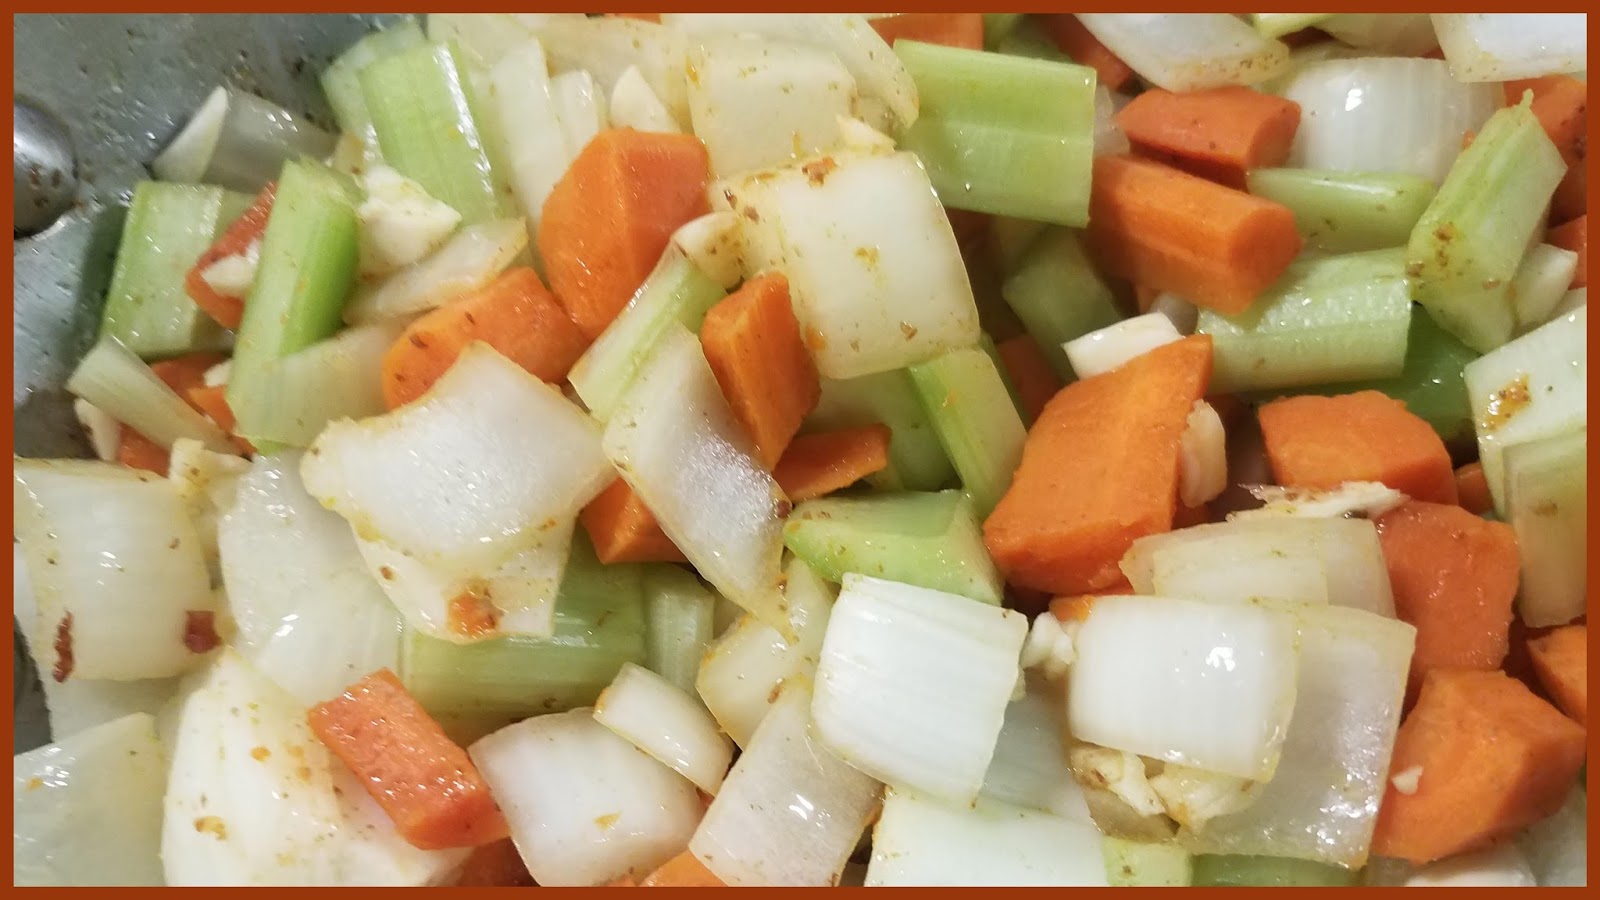
In the same pan make the soffritto by rough chopping & adding the onion, celery & carrots. Mince the garlic and sauté until vegetables are tender.
Cut the cauliflower into florets. Place in crock of slow cooker and add the soffritto, broth & spices.
Cook until the cauliflower is soft.
Mix tapioca starch with the milk and add to crock with the water. Blend with immersion blender until smooth.
Crumble bacon into crock and simmer until chowder has thickened. Stir in cheese a little at a time until smooth.
Serve & enjoy!
Even the youngest fella returned to the crock for a second helping of soup! And my bread connoisseur asked for a repeat batch of the biscuits!

Check out these links to see how the other Improvers used their winter squash & bacon:


July 13, 2017

Balsamic Berry Hand Pies

While I do love me some balsamic vinegar on my caprese, I'd never thought to use it in any but savory dishes. When July's #ImprovCookingChallenge ingredient list popped up, I figured I'd pass on this month's entry -- Berries & Balsamic -- yuk!
So I googled berries & balsamic - who knew it was a "thing"?! I figured I'd better try it, just in case the fellas might like it.
I used a mix of blueberries & raspberries.
The filling wasn't quite as bright-colored as I'd hoped, but it sure tasted killer
Turns out, balsamic vinegar enhances berry flavors!

I made a gluten-free pie crust and cut rounds.
Added a large dollop of filling, then topped it with a second round.
Since gf pastry doesn't always brown nicely, I brushed the tops with beaten egg & sprinkled sugar over before baking.
The crust was super flake-y and could not contain all the goodness that was the balsamic kissed berries!
So yummy! 

Good to the last crumb!


Here's what I used to make the filling:

  • 12 oz. blueberries
  • 12 oz. raspberries
  • 2 T. balsamic vinegar
  • 1/2 c. sugar
  • 1/4 c. cornstarch
  • 1/4 c. honey
  • 1 T. fresh lime juice
Stir in sauce pan over medium heat until mixture thickens.


Check out these other recipes from my fellow "Improvists" -- you won't be sorry!


June 8, 2017

Strawberry Jalapeño Cornmeal Cream Puffs

So, along with the Pretzel Dogs, I wished to use the jalapeño & cheese #ImprovCookingChallenge ingredients in a dessert. The past few weeks I've seen quite a few recipes featuring strawberries with cornmeal -- shortcakes, muffins, waffles... I wanted to make something gluten free, of course, but desired it a little "fancier" than cornbread. I looked for cornmeal pâte à choux, but consensus seemed to deem that ingredient as too heavy for puffs. I decided to use my successful gf profiteroles recipe from December and just sub in a little cornmeal. IT WORKED! THEY PUFFED!
The texture was what I wanted. Plus, they tasted of cornmeal!


Cornmeal Pâte à choux

1 c. water
½ c. butter (if using unsalted, add a pinch of kosher salt)
¾ c. Bob’s Red Mill® 
Gluten Free All Purpose Baking Flour 

¼ c. yellow cornmeal

4 large eggs

(It’s easier to assemble ingredients before starting, because the process goes fast!) Break the eggs into a spouted measuring cup. Preheat oven to 425°. Whisk the flour & cornmeal together. Line 2 baking sheets with parchment.
Combine the water & butter in a saucepan; bring to a rolling boil.
Remove from heat and add the flour mixture all at once, stirring vigorously.
Transfer the dough to the bowl of a stand mixer, and beat for a couple minutes until it’s cooled to below 125°F.
Beat in the eggs one at a time on medium speed; scrape the bowl after each addition.
After the last egg, beat the dough a couple minutes until it holds a peak.
Scoop about a 2 tablespoon-size portion of batter onto the prepared baking sheets for each puff. (Allow space for the puffs to expand.) This made 12 puffs for me. 
Bake for 10 minutes, then reduce the oven temperature to 350°. Bake for an additional 20 to 25 minutes, until the dough has risen and the pastries are a medium golden brown. (They should sound hollow if you tap them…) Remove the pastries from the oven, make a small slit in the top of each, and return them to the oven for another 5 minutes, to allow the steam to escape.
Transfer the puffs to a rack to cool.
Split each one in half & fill the bottom with a scoop of the jalapeño strawberry mixture then replace the tops. 
Serve immediately!


Now, about that filling:
It actually evolved from what I'd planned, but happened to turn out ever so much better than I thought it would.


First of all I candied fresh jalapeño slices in a piloncillo syrup.

I had found an interesting recipe for strawberry flan from Spain that I adapted for my filling. But here's what I did instead:
  • 1 lb. hulled fresh strawberries
  • 1 piloncillo cone, chopped
  • 1 c. half-and-half
  • 4 oz. caramel sirup (see Joy of Cooking pic)
  • 6 Eggs
  • 8 oz. cream cheese
  • finely chopped candied jalapeños, to taste
  • 2 T. tequila


(recipe from 1946 Joy of Cooking)
Add first 5 ingredients to blender & chop until smooth.
Pour into sauce pan & cook on medium to 180° (as if you were cooking a custard, so stir frequently...) Cover & chill.
Beat cream cheese & candied jalapeños until creamy. Add a shot of tequila & beat some more. Combine chilled strawberry mixture & beat again. Pour into freezer-safe container & freeze until firm. Scoop & enjoy!
(SOMEBODY has to eat the melty leftovers...)
(Enjoy responsibly! BTW - you don't have to add the tequila, but it just makes the flavor soooooooo much better.)

As always, check out the links to jalapeño & cheese recipes by my friends:

December 15, 2016

Yiaourti Me Meli ~ filled Profiteroles (gf)

EJ-cinnamonhoney (14)Since I had nothing better to do, I decided to make croquembouche for this month’s Improv Cooking Challenge. bahahaha! Not really – I stacked up some cinnamon cream puffs filled with Greek yogurt and drizzled honey all over them. (then attempted to photograph them before the cat tried to topple my tower…)EJ-cinnamonhoney (6)
For a couple years now the hubster likes a bowl of Greek yogurt, cinnamon, honey & frozen mixed berries before turning in for the night. Little did he know that he was “knocking-off” that famous Greek dessert called “Yiaourti Me Meli” – yogurt and honey (well, minus the walnuts and plus the berries…)
I decided to dress it up a little in a cinnamon profiterole and top it with a bit more honey.
This was my first attempt at pâte à choux using Bob’s Red Mill® Gluten Free 1-to-1 Baking Flour. I was pleasantly surprised at how well it turned out. I will definitely be making more gf puffs in the future!
FageI started by making the yogurt so the flavors could blend together. I used 2 cups of Greek yogurt, 1 teaspoon cinnamon, 1/3 cup local honey & 1/2 cup chopped walnuts.
EJ-cinnamonhoney (4)With that resting in the fridge, I went to work on the profiteroles.
EJ-cinnamonhoney (8)
Cinnamon Pâte à Choux

1 cup water
½ c. butter (if using unsalted, add a pinch of kosher salt)
½ t. cinnamon
1 c. Bob’s Red Mill® Gluten Free 1-to-1 Baking Flour 4 large eggs

  • (It’s easier to assemble ingredients before starting, because the process goes fast!) Break the eggs into a spouted measuring cup. Preheat oven to 425°. Line 2 baking sheets with parchment.
  • Combine the water, butter and cinnamon in a saucepan, bring to a rolling boil.
  • Remove the pan from the heat, and add the flour all at once, stirring vigorously.
  • Transfer the dough to the bowl of a stand mixer, and beat for a couple minutes until it’s cooled to below 125°F.
  • Beat in the eggs one at a time on medium speed; scrape the bowl after each addition.
  • After the last egg, beat the dough a couple minutes until it holds a peak.
  • Scoop the batter onto the prepared baking sheets using a 2-tablespoon cookie scoop. (Allow space for the puffs to expand.)
  • Bake for 10 minutes, then reduce the oven temperature to 350°. Bake for an additional 20 to 25 minutes, until the dough has risen and the pastries are a medium golden brown. (They should sound hollow if you tap them…) Remove the pastries from the oven, make a small slit in the top of each, and return them to the oven for another 5 minutes, to allow the steam to escape.
  • Transfer the puffs to a rack to cool.
  • When they are cool enough to handle, split each one in half to air out the centers, which will help keep the pastries from becoming soggy.
  • Fill the bottom half of the profiterole with the yogurt mixture then replace the top. Dip  in honey and form stack on a serving plate. Drizzle with more honey.
  • Serve immediately; refrigerate any leftovers.
Yield: 2 dozen puffs
EJ-cinnamonhoney (12)They were quite tasty! To see recipes for more tasty cinnamon & honey dishes, click on the links below:

October 19, 2016

GF Red Velvet Cheesecake

EJ-gfRedVelvetCheesecake (46)Well, today is my final post for #Choctoberfest2016 … BTW – Did you enter the Rafflecopter drawing for the prize pack worth $350? (The drawing was extended to October 22nd because of weather/transportation/shipping issues related to Hurricane Matthew…) 14441212_996776515089_3185670107435955211_n
I’m pretty sure I saved the best for last!EJ-gfRedVelvetCheesecake (27)
This cheesecake…
EJ-gfRedVelvetCheesecake (34)OH!MY!
Let’s start with the crust:
stir together
  • 2 c. almond meal
  • 1 T. brown sugar
  • 3 T. melted butter
  • 2 T. honey
Prepare the bottom (parchment or butter) of 9” springform. Combine ingredients until crumbly. Press firmly into pan.EJ-gfRedVelvetCheesecakecrustFor the cheesecake:
in the mixer
  • 24 oz. softened cream cheese
  • 11/2 c. sugar
  • 4 eggs
  • 1 c. Greek yogurt
  • 1/2 c. buttermilk
  • 1 t. vanilla
  • 2 T. baking cocoa mixed with 2 oz. red food coloring
  • 1 t. white vinegar with 1/4 t. baking soda
Cream the sugar and cream cheese until smooth. Add eggs, one at a time. Stir in the remaining ingredients just until everything is well-combined. Scrape batter onto prepared crust. Bake in pre-heated 350° oven for ten minutes, then reduce temperature to 300°. Bake for 75 minutes, or until firm in the center. Turn oven off, but let the cheesecake stand in there for 30 minutes. Remove to rack & let cool completely. Cover & chill in refrigerator while making the Ermine Icing.
EJ-gfRedVelvetCheesecake.jpgYou absolutely can not top a cheesecake with cream cheese frosting! And you should never, really, top a red velvet anything with something other than the traditional boiled milk icing. (The gentle cocoa flavor just gets too overwhelmed…) Trust me on this. {end rant Winking smile}
for the icing:
  • 3 T. gf flour (I used this)
  • 2 T. arrowroot starch
  • 1 c. whole milk
  • 1 t. vanilla
  • 1 c. butter, room temperature
  • 1 c. granulated sugar
In a small saucepan over medium heat, whisk the flour & starch into the milk. Heat until it simmers, stirring constantly until it becomes thick like pudding. Remove from heat and whisk in vanilla. Pour into a bowl & cover surface with plastic wrap and cool completely.
In the mixer, cream the butter and sugar until it’s light & fluffy. Beat for five minutes.
While the mixer is running (medium speed) add the cooled milk mixture about a quarter cup at a time. Beat until mixture is light & fluffy and resembles whipped cream. Top cheesecake and refrigerate.EJ-gfRedVelvetCheesecakeErmine
The next time I attempt this cheesecake (and, there will be a next time!) I will probably add more cocoa. The chocolate flavor disappeared behind the cream cheese… But I had no complaints from the taste-testers.EJ-gfRedVelvetCheesecake (44)
Check out the #Choctoberfest links below:

October 12, 2016

GF Mexican Chocolate Churros

EJ--MexChocChur (23)Well, have you entered the Rafflecopter giveaway for #Choctoberfest2016 yet? You should probably do that here right now! The sponsors have some great prizes they would love to send you…14441212_996776515089_3185670107435955211_n
This is the third day of our chocolate celebration, so I wanted to try something to put a little “pep” into the middle of your week. The subtle cayenne addition will wake your mouth up! (But you can soothe it with our luscious dairy-free caramel sauce, if you’d like…)
Gluten-Free Mexican Chocolate Churros
Whisk together in mixing bowl:
    • 1 c. gf flour
    • 1/2 c. arrowroot starch
    • 2 T. baking cocoa powder
    • 2 t. cinnamon
    • 1/4 t. cayenne
    • 1/2 t. espresso powder
Heat to rolling boil in microwave-safe cup:
    • 1 c. water
    • 1/2 c. butter
    • 2 T. brown sugar
    • 1/4 t. kosher salt
Pour boiling liquid ingredients onto dry ingredients, add 1/2 t. almond extract and beat until smooth. Add 4 eggs, one at a time, beating until the dough is shiny after each addition. Spoon into pastry bag fitted with large star tip. Pipe 6-inch length of dough into 350° oil, and fry both sides. Drain excess oil and dredge in 1/2 c. Demerara sugar mixed with 1 t. cinnamon. Serve immediately.EJ--MexChocChur (4)Our gluten-free churro batter was a little too thin to pipe with the star tip, so we had to improvise with a ribbon shape using this wonderful little Wilton candy-melt tool:20161012_130203
Dairy-free Caramel Sauce  (adapted from a Silk® recipe)
Stir together in saucepan:
    • 1 c. sugar
    • 1/4 c. water
    • 1/4 t. lime juice (to inhibit crystallization)
Heat on medium for about 15 minutes without stirring, or until the mixture turns amber. Remove from heat and stir in:
    • 1/2 c. Silk® Coconutmilk (watch out! it will bubble up – just keep stirring until smooth.)
Add:
  • 2 T. coconut oil
  • 1 t. vanilla
  • 1/4 t. kosher salt
Stir to combine, then serve immediately.20161012_130303
The churros taste so wonderful on their own – but when you dip them in that caramel sauce… ohhhhhhhhhh!
Thank you for joining us today! Make sure you check out some more #Choctoberfest recipes by following the links below: